Update Dependencies with Dependabot, Cypress and Netlify
To preface things, this post is in the context of a JavaScript project, specifically, my blog iamdeveloper.com.
In terms of hosting my site, I use Netlify. They have great tools and it’s very easy to get setup so that PRs and pushes to master create deployments. If you want to check out Netlify, I highly recommend checking out their awesome documentation.
If you are in charge of any repositories you’ve certainly had to deal with updating dependencies of your project. There are great tools that can manage this for you. One of those great tools is Dependabot (congrats on being acquired by GitHub!). If you want to learn how to get setup with Dependabot, check out their documentation. Dependabot creates pull requests in your repository and then you can merge them yourself. This was what I was doing as I wanted to test things out first before merging the dependency update PR. This becomes tedious and time consuming even if PRs are already being created for you.
Dependabot has settings that allows Dependabot to automatically merge PRs it generates. This sounds great at first, but not ideal as just having unit tests pass (or no tests! 😱) and then merging does not install a lot of confidence. While on vacation, I thought to myself, just bite the bullet and add Cypress for end to end (e2e) testing to my Continuous Integration/Continuous Delivery (CI/CD) pipeline. I use it at work and it’s a great tool. If you’re new to Cypress, I highly recommend checking out their documentation.
I automated dependency updates and changes I make to my blog (not content) thanks to Cypress, Netlify and Dependabot. Cypress caught a UI regression when I updated my burger button tonight. 🔥 https://t.co/WRUeaayGht #DevDiscuss
— Nick Taylor (he/him) (@nickytonline) August 14, 2019
If you’re not familiar with e2e testing, basically they are tests you write that act as if they were a user on your site. For example an e2e test can click on items and add them to a shopping cart. For Cypress, during the development phase, they have a great task runner that allows you to run e2e tests against Chrome (other browsers are on the way). It is an Electron app and gives you all the power of the developer tools you are used to in a browser. In the context of CI/CD, when Cypress runs, it executes tests against a headless browser (Chrome only for the time being).
So armed with all this information, lets put all the pieces together. One last bit is that my blog runs on Gatsby, so some of the configuration will be Gatsby related. Regardless, the meat of this post can apply to other projects.
Get Your Repository Set Up for CI/CD permalink
My site is hosted on GitHub, so we'll go through the settings there. If you use another service like GitLab, the settings are similar.
From your repository main page, click on the Settings tab. From there click the Branches section to create a branch protection rule.
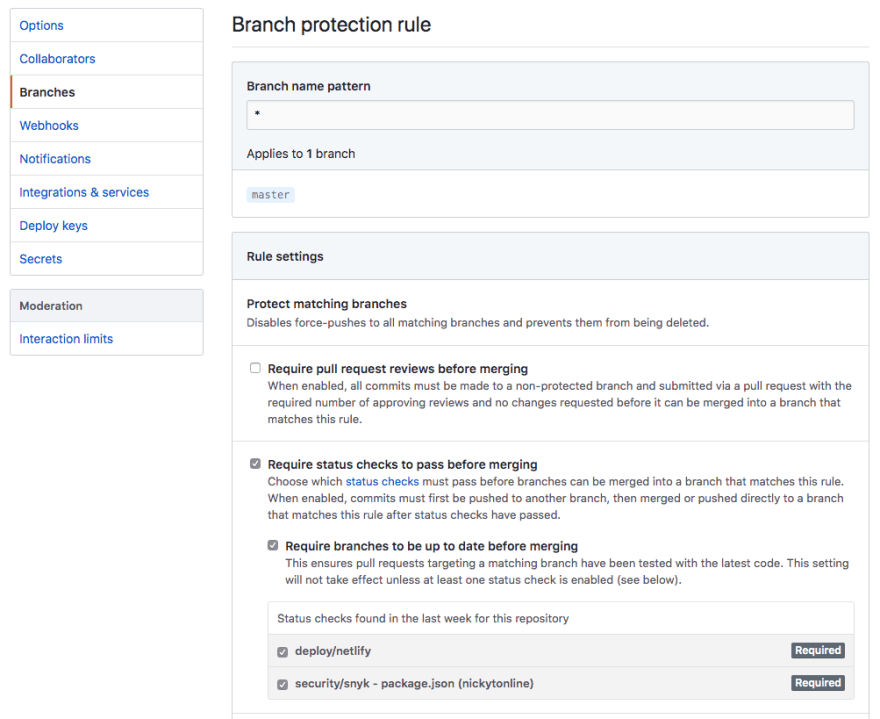
In my case, since I use Netlify and Snyk, I want both those status checks to pass before merging. Click on the Save Changes button.
Get Cypress Set Up permalink
Since we’re currently talking about a JavaScript project, let’s add the npm scripts we need to get Cypress up and running for local development.
- Install Cypress by running
npm install cypress -D(-D because it’s a dev dependency) - Install the fkill CLI package as we’ll need that as well by running
npm install fkill-cli -D - Now let’s add some npm scripts to our package.json
  "scripts": {
		...
    	"prebuild": "CI=1 npm i cypress",
    	"e2e": "cypress run",
    	"e2e:dev": "CYPRESS_baseUrl=http://localhost:8000 cypress open"
		"build":"gatsby build",
		"postbuild":"gatsby serve & npm run e2e && fkill:9000",
		"develop":"gatsby develop",
		...
  },
Let’s start off with the e2e:dev script. What this script does is start Cypress’ test runner. The environment variable CYPRESS_baseUrl is set here, because we want to override the value in the cypress.json file. The value stocked in there is the one we will be using for our CI/CD pipeline. If you want to learn more about the cypress.json configuration file, check out their totally tubular documentation on it.
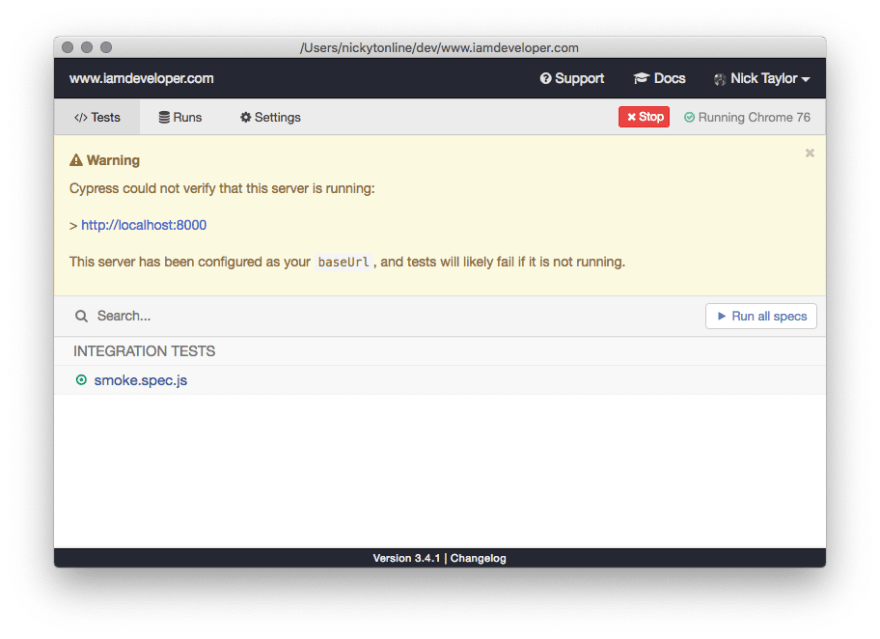
Alright, let’s run the Cypress task runner. From the command line, run npm run e2e:dev. It takes about 5-10 seconds to start up usually. Because it’s the first time you run it, Cypress is going to create a cypress folder in the root of your project with a bunch of example files to get you up and running. Feel free to remove these later or keep them around as a learning tool. Let’s stop the task runner. You can quit it or simply press CTRL + C from the command line where you started it.
For the sake of this post, we’re just going to create one simple test. Let’s create a file in the cypress/integration folder called, smoke.spec.js. Open that file and add the following:
describe('Smoke test site', () => {
    it('Should load the main page', () => {
        cy.visit('/');
    });
});
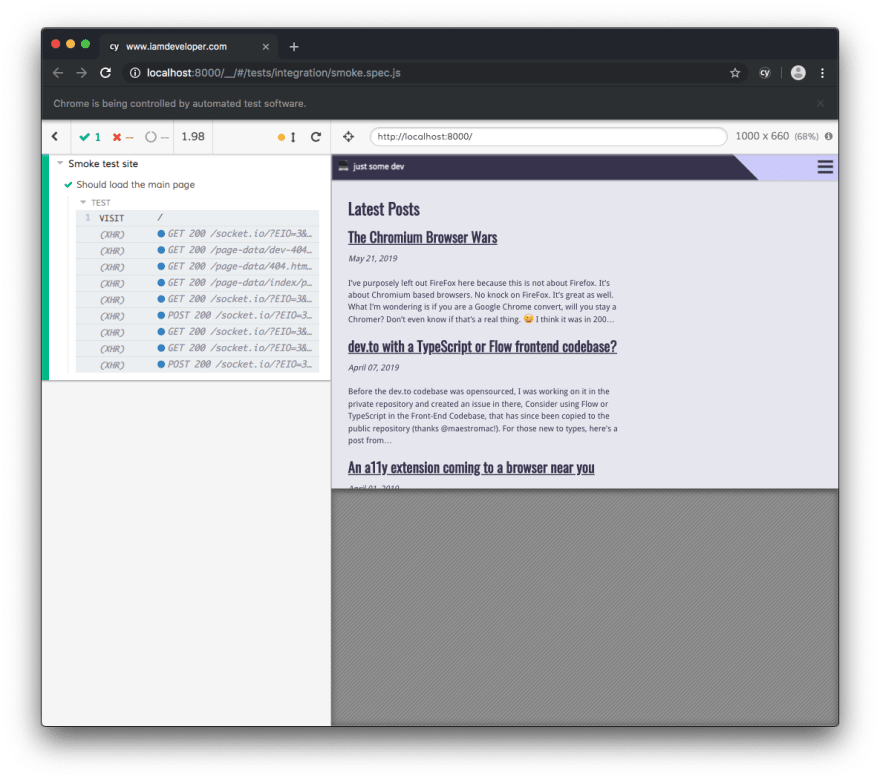
Save the file. Since we’re in the context of a Gatsby site, let’s start up the Gatsby local development server by running npm run develop. All this does is run the following Gatsby CLI command, gatsby develop. Once the site is built, it will be running on port 8000 (default).
Let’s start up the task runner again by running, npm run e2e:dev from the command line. In the task runner, the smoke.spec.jsshould be in the list of test files now. Click on it to start running the tests.
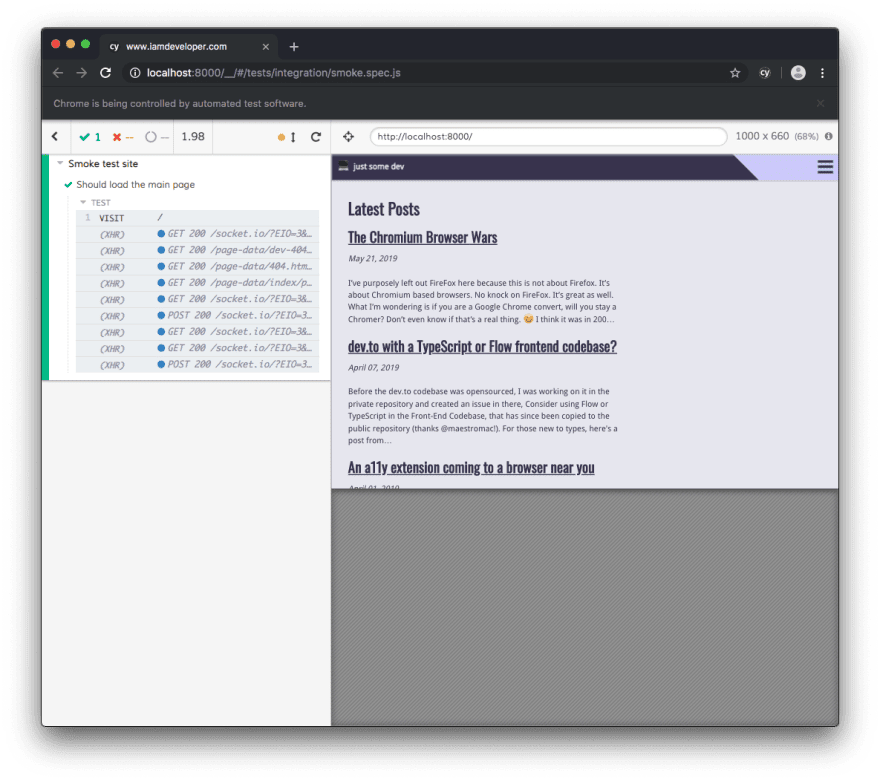
If you’re Gatsby site is running the test should pass.
Congrats, you are awesome. At this point you would right more tests to the point that you are confident that if these all pass, you are good to ship.
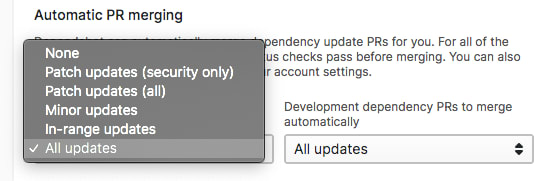
At this point we’re ready to revisit our Dependabot configuration for our repository. Let’s change the settings to allow for automatic PR merging of all our dependencies (or configure it to the level you prefer.
Alright, let’s go through the extra setup to have Cypress run as part of our CI/CD pipeline. The prebuild script is required because, at least on Netlify, you cannot cache binaries. See this article, Test on Netlify | Gatsby + Netlify + Cypress.io, for more information.
"prebuild": "CI=1 npm i cypress",
The e2e script is what we’ll use to run Cypress in our CI/CD pipeline. It runs all the e2e test files in a headless browser.
"e2e": "cypress run",
The build script is what I used to build my site. It’s included just to explain the postbuild. 😉 If you’re not aware, you can run pre and post scripts on npm script. For more information, see the npm documentation.
"postbuild":"gatsby serve & npm run e2e && fkill:9000",
For our postbuild script, we want to run our Gatsby site in the container. The Gatsby CLI has a bunch of great commands, including gatsby serve which starts your site on port 9000 (default). While the server starts, we also want to start up the e2e tests. This is where our e2e script comes in. Once the tests finish running in the container (hopefully successfully 😉), we want to gracefully stop the site. This is where the fkill CLI comes in handy. Now since this is a post build step, things will continue along in Netlify deployment land and eventually the site will go live. In the case of a PR for dependency updates, this check will pass and because Dependabot is configured to merge PRs automatically, we’ve reached full automation of our dependency updates.
If you’d like to see the whole setup of this on my site, check out my repository on GitHub.
The https://github.com/nickytonline/iamdeveloper.com repository on GitHub